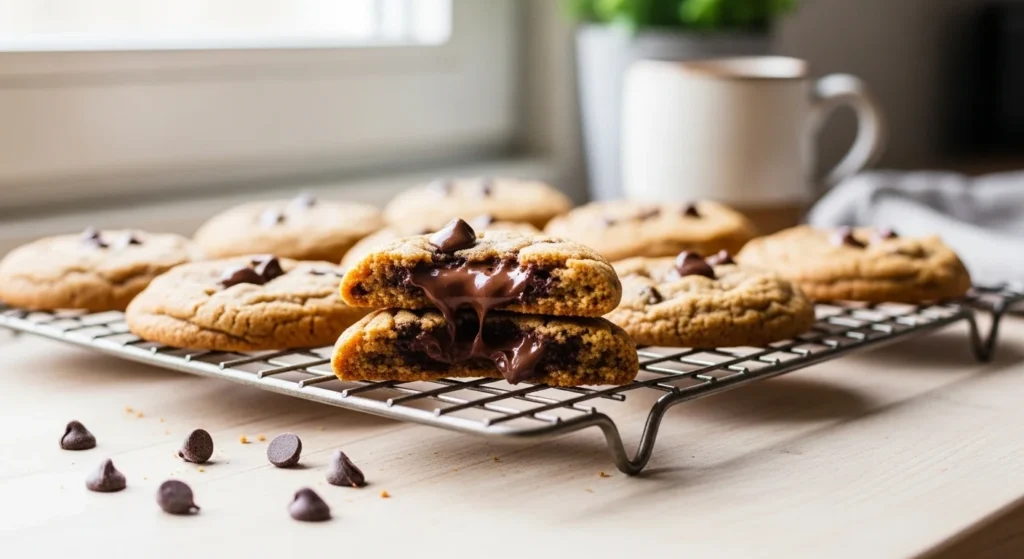
There’s a reason vegan chocolate chip cookies are everywhere right now: when they’re done right, they’re just as chewy, gooey, and “classic” as the originals—no weird aftertaste, no dry crumbly texture, and definitely no “health-food cookie” vibes. The secret isn’t complicated. It’s all about the right fat + the right sugar + the right bake time.
Below is a simple, reliable method you can make in one bowl (or one bowl + a measuring cup), with optional upgrades for bakery-style thickness.
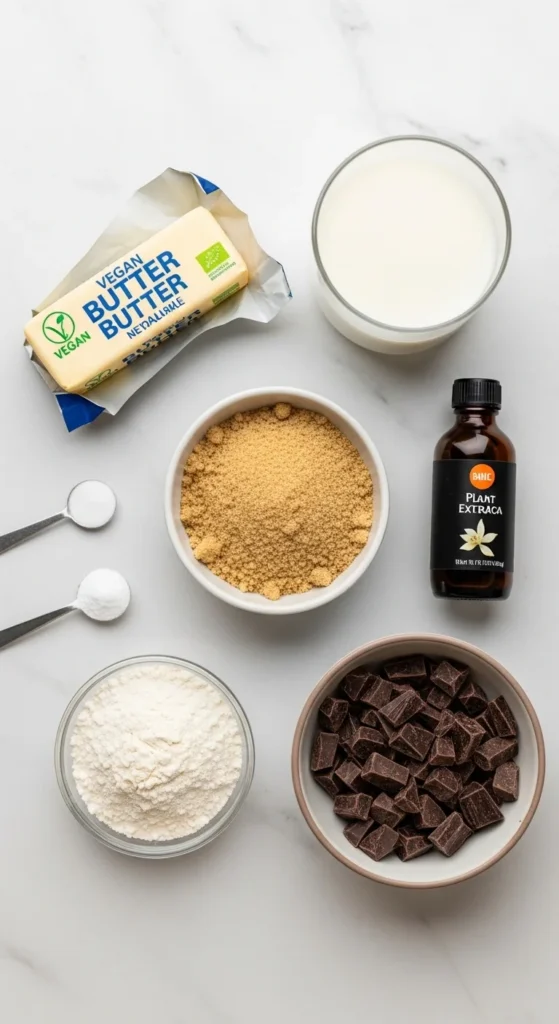
What You’ll Need (Pantry-Staple Ingredients)
You don’t need eggs or dairy to get that “wow” cookie texture. Here’s what makes vegan cookies taste legit:
- Vegan butter or coconut oil (fat = flavor + chew)
- Brown sugar (molasses = moisture + chewy bite)
- Plant milk (binds + smooth dough)
- Vanilla (makes chocolate taste deeper)
- All-purpose flour (or 1:1 gluten-free blend)
- Baking soda + a pinch of salt
- Chocolate chips or chocolate chunks (chunks melt extra gooey)
- Optional: cornstarch/arrowroot for extra soft centers
Quick rule: If you want cookies that taste like classic ones, use brown sugar and don’t overbake.
Step-by-Step: Chewy, Gooey Vegan Chocolate Chip Cookies
This recipe style is meant to be easy and forgiving. Use room-temp ingredients for the smoothest dough.
1) Mix the wet ingredients
In a mixing bowl, combine:
- Vegan butter (softened) or melted coconut oil
- Brown sugar + a little white sugar (optional, for crisp edges)
- Vanilla
- Plant milk (2–4 tbsp as needed)
Mix until creamy and smooth. If your butter is cold, your dough can look chunky—just keep mixing.
2) Add the dry ingredients
Add:
- Flour
- Baking soda
- Salt
- Optional cornstarch (for soft chew)
Mix just until you don’t see dry flour. Overmixing = tougher cookies.
3) Fold in chocolate
Stir in chips/chunks last so they don’t get smashed.
Pro visual tip: Save a handful of chocolate and press it on top of each dough ball before baking.

4) Scoop and bake
- Scoop dough into balls (about 2 tablespoons each)
- Space them 2 inches apart
- Bake at 350°F / 175°C for 10–12 minutes
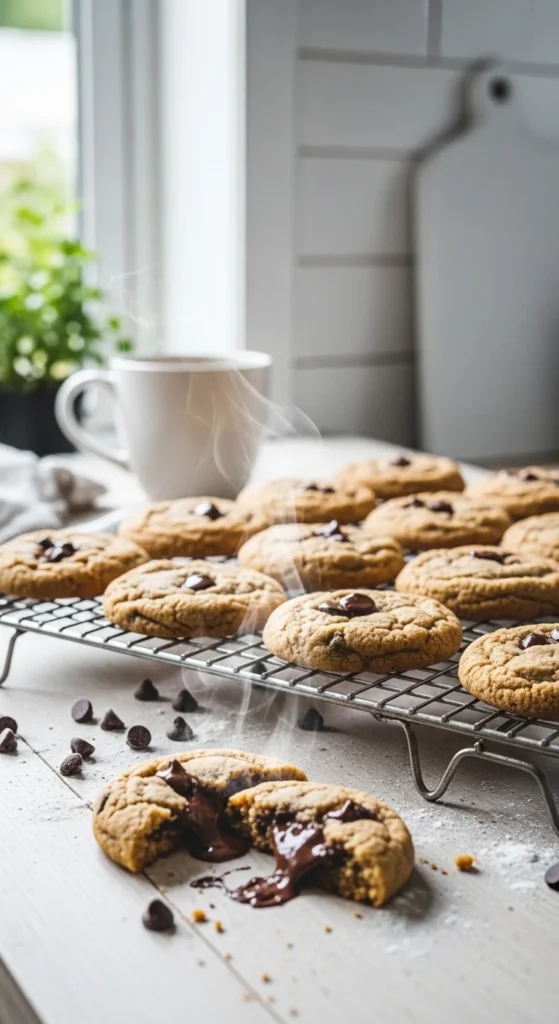
They should look slightly underbaked in the center when you pull them out. That’s exactly right.
5) Cool (this is part of baking!)
Let cookies cool on the tray for 5–10 minutes before moving. They finish setting as they cool—this is how you keep the centers soft instead of dry.
The “Taste Amazing” Upgrades (Optional, But Worth It)
If you want bakery-style results, these are the upgrades people love:
- Chill the dough 30 minutes (optional): thicker cookies, less spreading
- Use chocolate chunks instead of chips: meltier pockets, richer look
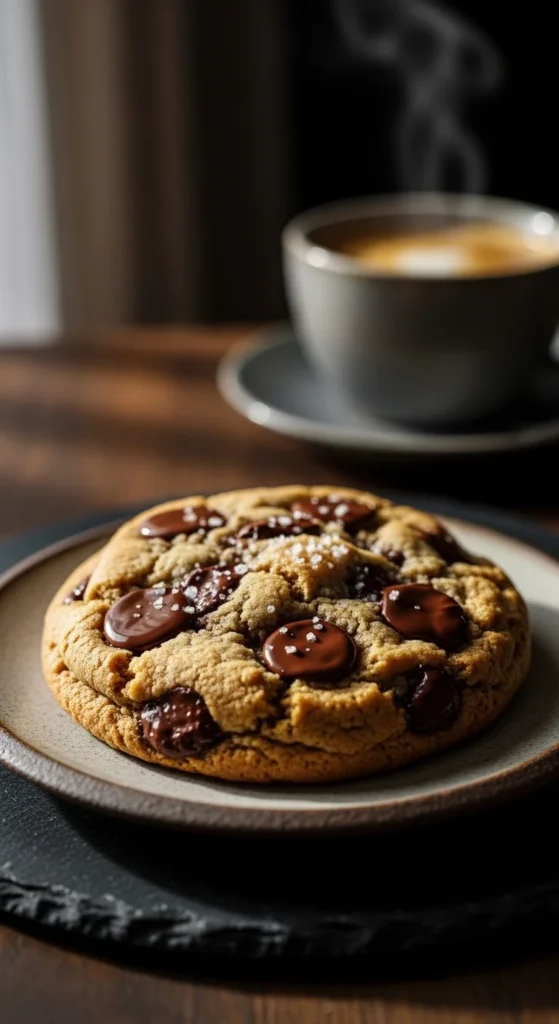
- Add flaky sea salt on top: makes chocolate taste bigger and less sweet
- Try bread flour (swap part of AP flour): extra chew (advanced but awesome)
Fix Common Vegan Cookie Problems (So You Nail It Every Time)
Cookies spread too much
- Dough too warm → chill 20–30 minutes
- Butter too melted → use softened vegan butter next time
- Tray too hot → use a cool baking sheet for the next batch
Cookies are dry or cakey
- Too much flour → spoon and level (don’t pack it)
- Overbaked → pull them when centers look slightly soft
- Not enough brown sugar → increase brown sugar for moisture/chew
Dough is too crumbly
- Add plant milk 1 teaspoon at a time until it holds together
- Make sure your fat wasn’t too cold to blend properly
Cookies taste “not classic”
- Add more vanilla
- Use brown sugar (or dark brown sugar)
- Use good chocolate (dark or semi-sweet chunks taste more “bakery”)
Fun Variations People Love
Want content ideas for your recipe post or Pinterest pins? Add a variation section:
- Double chocolate: add cocoa powder + extra chunks
- Nutty: walnuts/pecans + dark chocolate
- Oat version: swap some flour for oats for chew
- Gluten-free: use a 1:1 GF flour blend (add 1–2 tbsp extra milk if needed)
Storage Tips (Keep Them Soft for Days)
- Store in an airtight container for 3–5 days
- For extra softness, add a small piece of bread in the container (it helps keep moisture)
- Freeze baked cookies up to 2 months (thaw at room temp)
Takeaway
Vegan chocolate chip cookies don’t need fancy ingredients to taste incredible. Focus on brown sugar for chew, the right bake time for gooey centers, and gentle mixing—and you’ll get cookies that honestly surprise people.
Save this recipe for later, and if you make a batch, bake one “test cookie” first so you can adjust thickness, spread, and gooey level exactly how you like it. 🍪✨